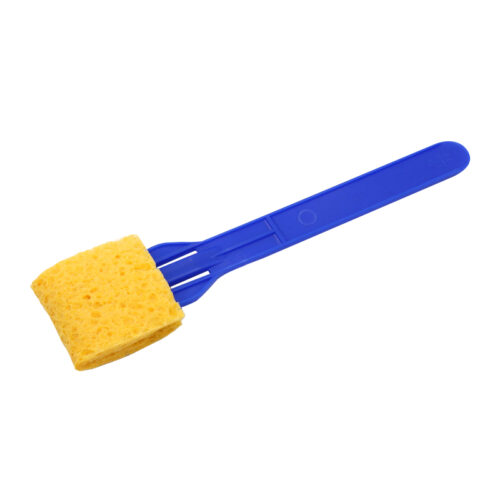
Sampling with a cellulose sponge is a widely used technique in industries such as environmental testing, diagnostics, and industrial quality control. Thanks to their exceptional absorbent properties, cellulose sponges are a practical and reliable tool for collecting samples from surfaces or liquids. In this step-by-step guide, we’ll explain how to use MEIDIKE GENE® cellulose sponge correctly to ensure accurate and consistent results.
What is a Cellulose Sponge?
A cellulose sponge is a natural, highly absorbent material made from cellulose fibers. Due to their porous structure, these sponges can efficiently absorb and transfer liquids or particulates. This quality makes them a preferred tool for sample collection in microbiological studies, environmental monitoring, and clinical applications. Additionally, cellulose sponges are versatile and easy to use, even in challenging environmental conditions.

Click here for MEIDIKE GENE® cellulose sponge information
Step-by-Step Instructions for Sampling with MEIDIKE GENE Cellulose Sponge
Whether you’re conducting environmental testing or microbiological sampling, following the correct procedure is essential for obtaining reliable results. Let’s break down the process:
1. Label the Bag
Start by labeling the sampling bag in the designated white area. If needed, use a pen to record sampling details such as location, time, or sample ID. Note: Gloves are not necessary for this procedure unless otherwise specified by your protocol.
2. Open the Bag
Carefully open the bag along the dotted line. Avoid touching the inside of the bag to maintain sample integrity.
3. Release the Sponge Stick
Pull the bag downward from the outside to release the sponge stick. Be mindful not to touch the stick below the thumb stop, as this could contaminate the sponge or inner surface of the bag.
4. Collect the Sample
Using the sponge, vigorously rub the target area to collect your sample. For best results, focus on a defined area, such as 30 x 30 cm (1 x 1 ft), depending on your testing requirements.
Important Note: Avoid using sponge-sticks on rough surfaces, as friction may cause the sponge to detach from the stick.
5. Return the Stick to the Bag
Once you’ve collected the sample, carefully return the stick to the bag. Insert the stick no deeper than the thumb stop to prevent contamination.
6. Remove the Sponge from the Stick
To remove the sponge:
- Grasp the sponge from the outside of the bag.
- Press and pull it from the middle of the stick’s fork-like end.
- Use your thumb and index finger to gently work the sponge back and forth until it detaches from the stick.
7. Seal the Bag
Close the bag using the attached twist tie. Roll the bag’s opening tightly, then secure the tie by kinking it to the inside of the bag. This step helps prevent leaks or contamination during transport.
Tips for Successful Sample Collection
- Plan Ahead: Ensure you have all necessary materials, including labeled bags, sponge sticks, and any additional tools required.
- Minimize Contamination: Handle the sponge and stick only as instructed to avoid accidental contamination.
- Practice Consistency: Apply even pressure and follow the same technique for all samples to maintain uniformity.
Applications of Cellulose Sponge Sampling
This sampling method is used in various fields, including:
- Environmental Testing: Monitoring surfaces for contaminants or pathogens.
- Food Safety: Collecting samples from processing equipment or surfaces to ensure hygiene compliance.
- Clinical Research: Sampling biological materials for diagnostic purposes.


